How do I set up my Azure AD for a BOC product?
Important: This guide provides a possible approach to setting up Microsoft Azure AD, based on best practice. However, please note that we cannot take any legal responsibility for the implementation and the possible consequences resulting from it. It is recommended to involve an IT specialist on your side to verify and maintain the connection.
| Step | Description | |
|---|---|---|
| 1. | Use the search bar (1) of your Azure AD Portal to find "Enterprise applications" (2). | 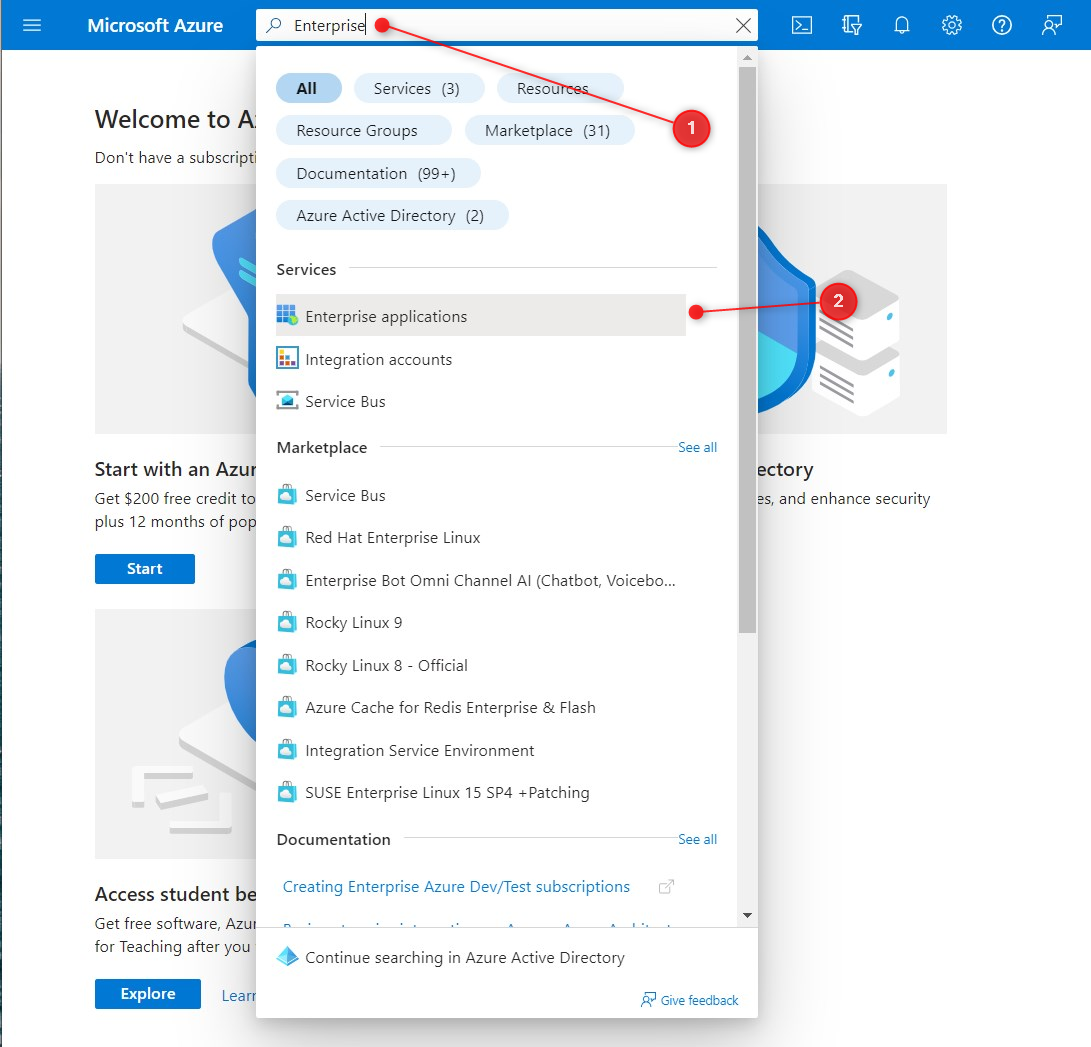 Click here to enlarge Click here to enlarge |
| 2. | Under All applications (1) select New application (2), then click on Create your own application (3). | 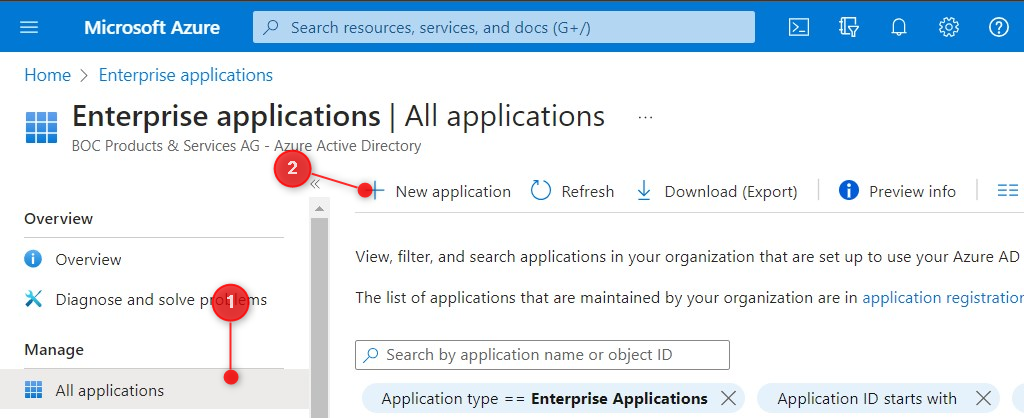 Click here to enlarge Click here to enlarge |
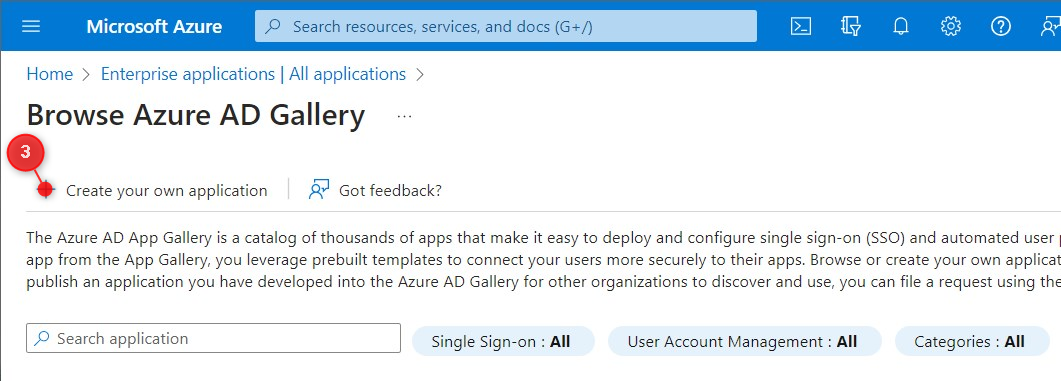 Click here to enlarge Click here to enlarge | ||
| 3. | Enter the name of your BOC application e.g. "ADONIS ", "ADOIT " or "ADOGRC ". | 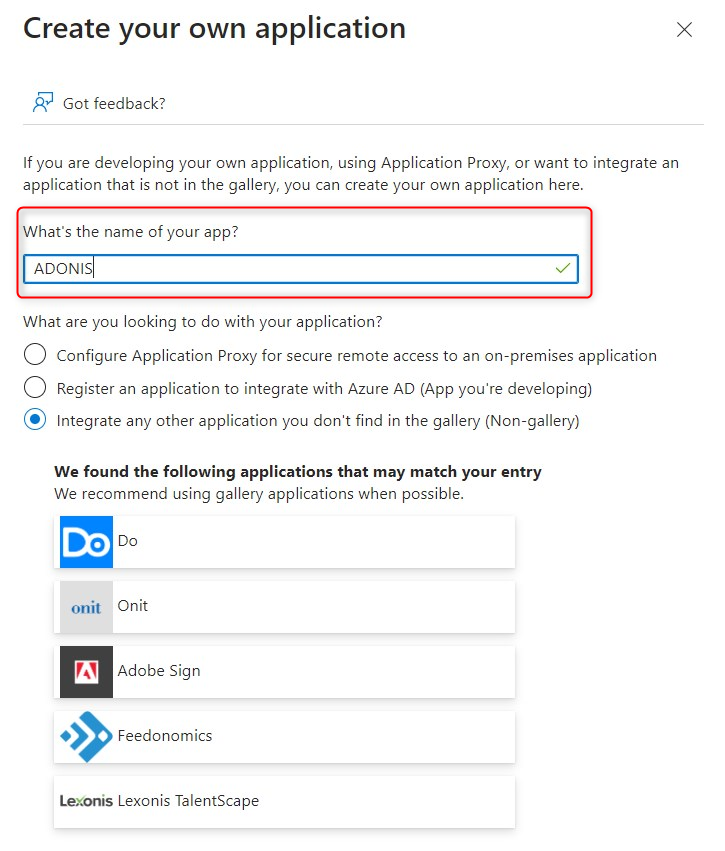 Click here to enlarge Click here to enlarge |
| 4. | Open the Azure application you just created and select Single sign-on (1), then switch to SAML (2). | 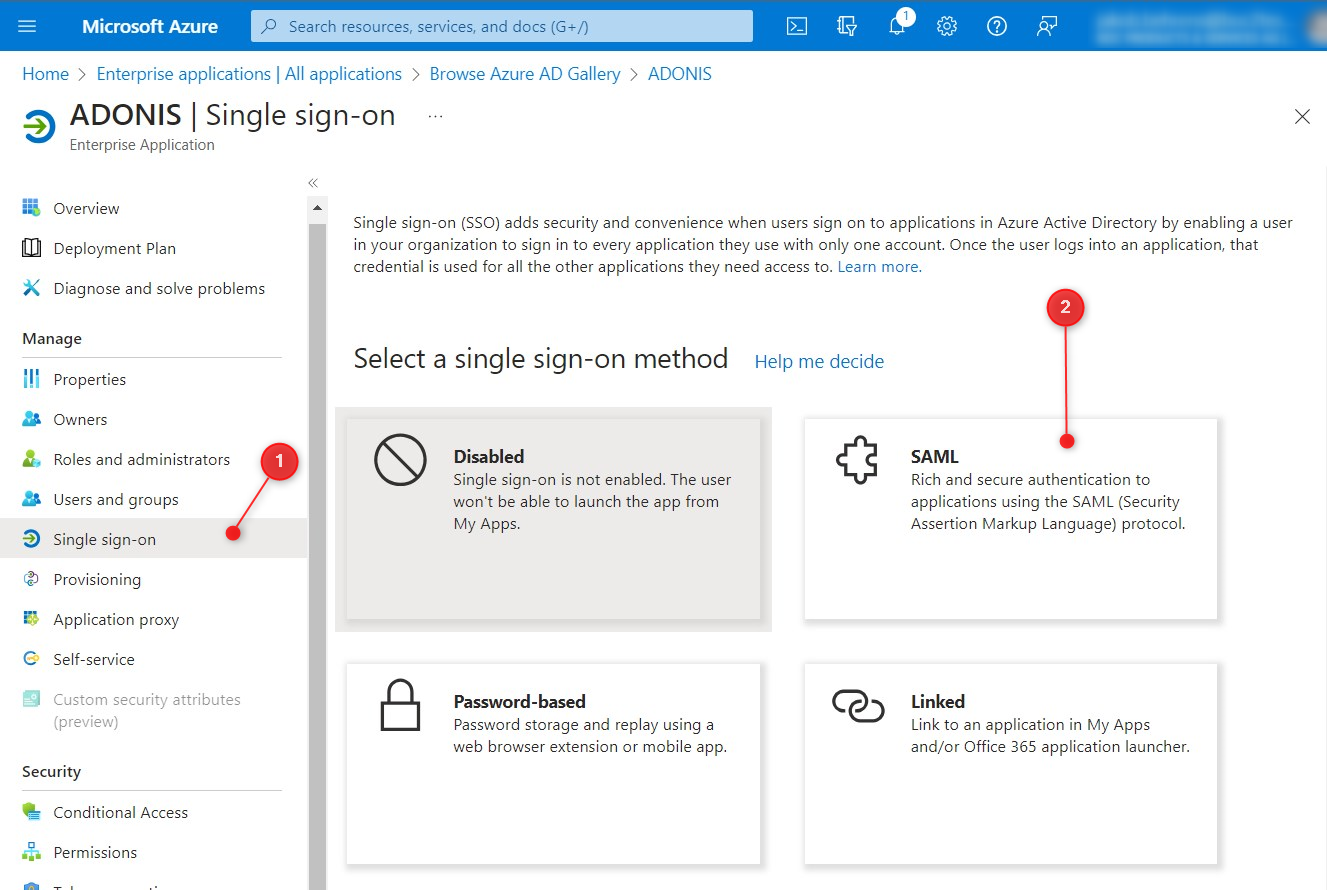 Click here to enlarge Click here to enlarge |
| 5. | Under the item Basic SAML Configuration, select the Edit (1) function and enter the "Identifier (Entity ID)" and "Reply (Assertion Consumer Service URL) Attributes" which you have received from the BOC technical support. | 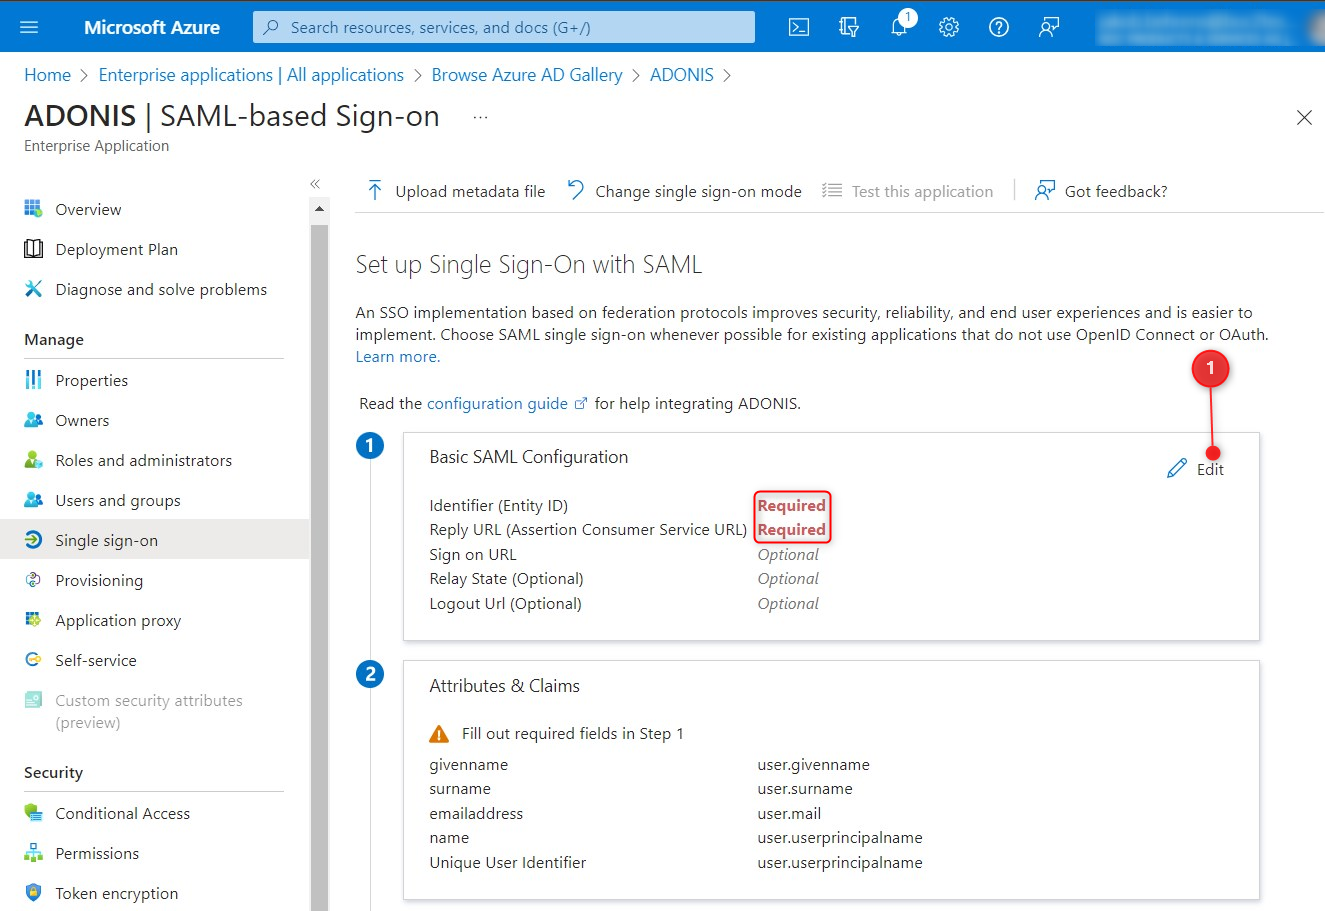 Click here to enlarge Click here to enlarge |
| 6. | After entering, scroll down to Attributes & Claims and click on Edit | 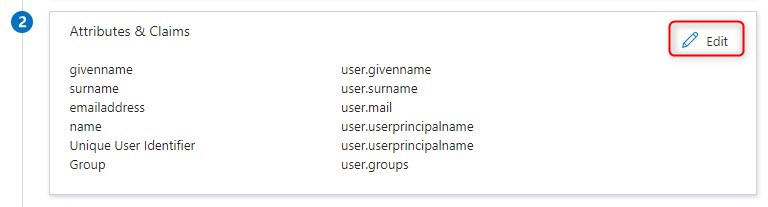 Click here to enlarge Click here to enlarge |
| 7. | Adjust the claims. Required are user.givenname, user.surname, user.mail, user.groups and user.userprincipalname | 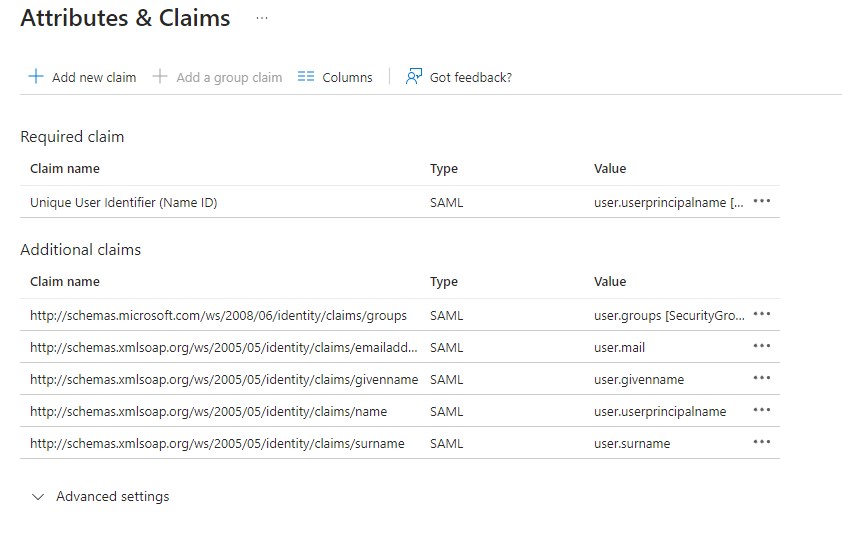 Click here to enlarge Click here to enlarge |
| 8. | Scroll down to Step 4 and copy the Login URL from the Set up ADONIS panel. Share the Login URL with your BOC technical support contact. |  Click here to enlarge Click here to enlarge |
| 9. | Download the Federation Metadata XML and/or the Certificate (Base64) from the SAML Certificates panel | 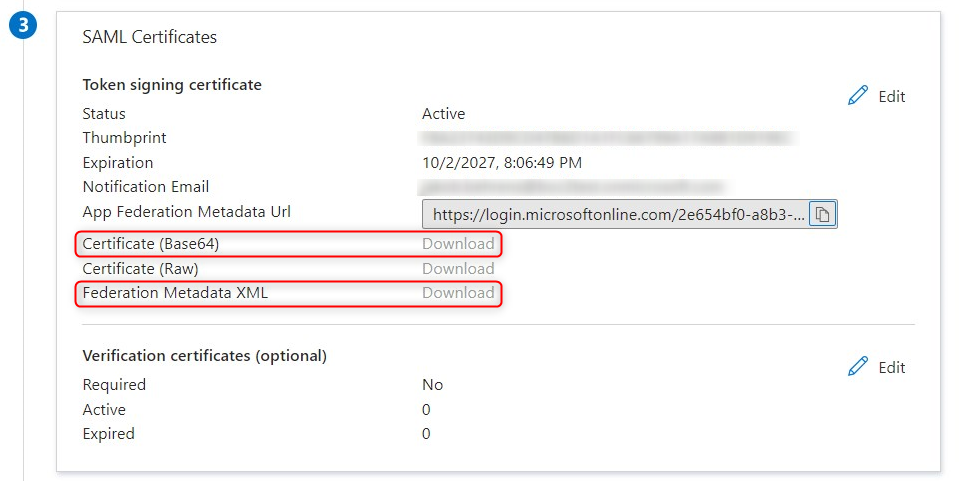 Click here to enlarge Click here to enlarge |
| 10. | Upload those files to the fileshare link provided by your BOC technical support contact. | |
| 11. | Now search for "Azure Active Directory " using the search bar (1) and click on the result (2). | 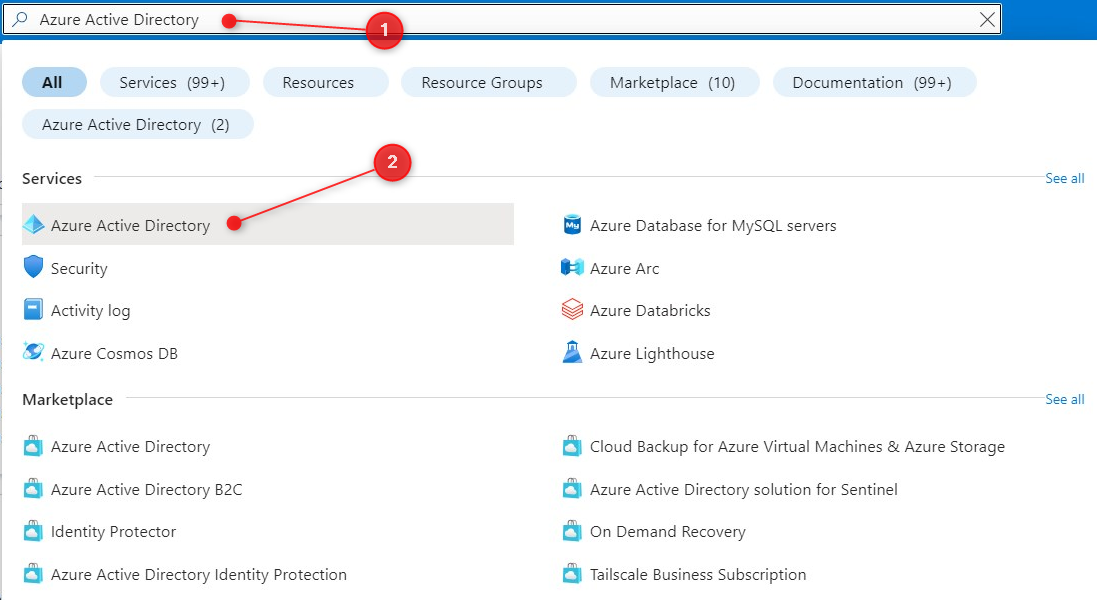 Click here to enlarge Click here to enlarge |
| 12. | Select App registrations and find your newly created application on the right side. Open it. | 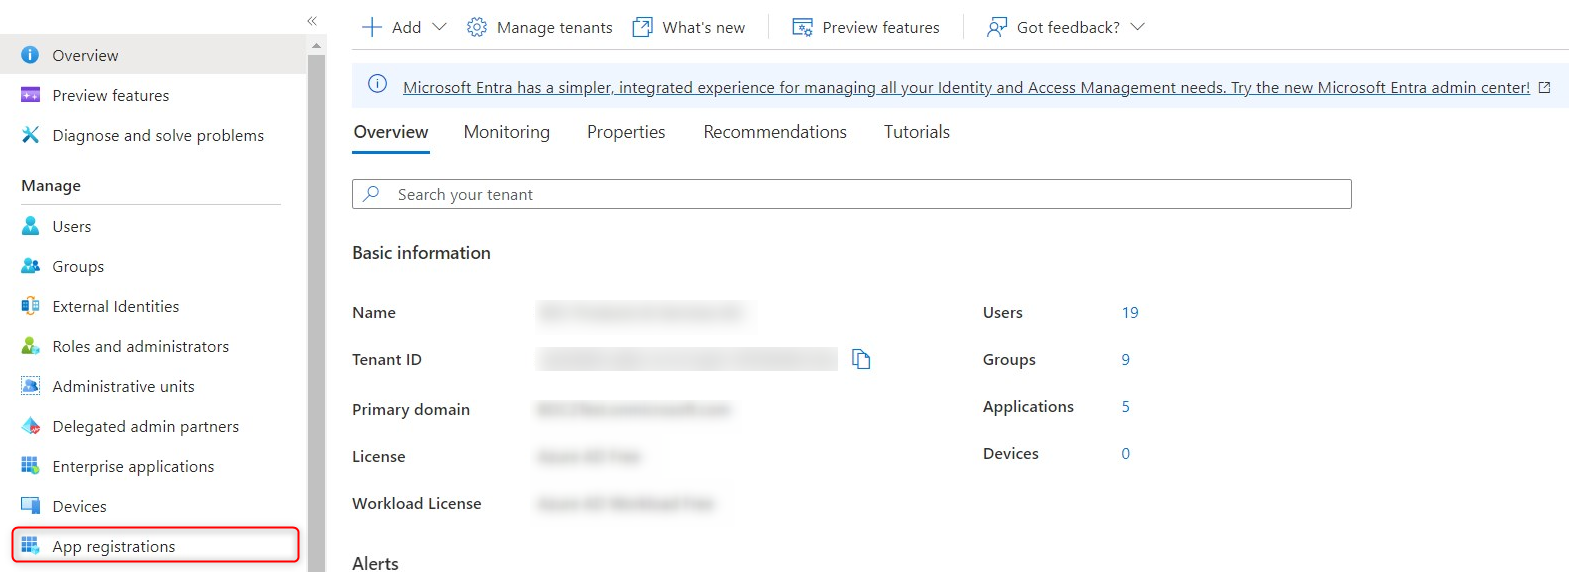 Click here to enlarge Click here to enlarge |
| 13. | Select Certificates & secrets on the left side. | 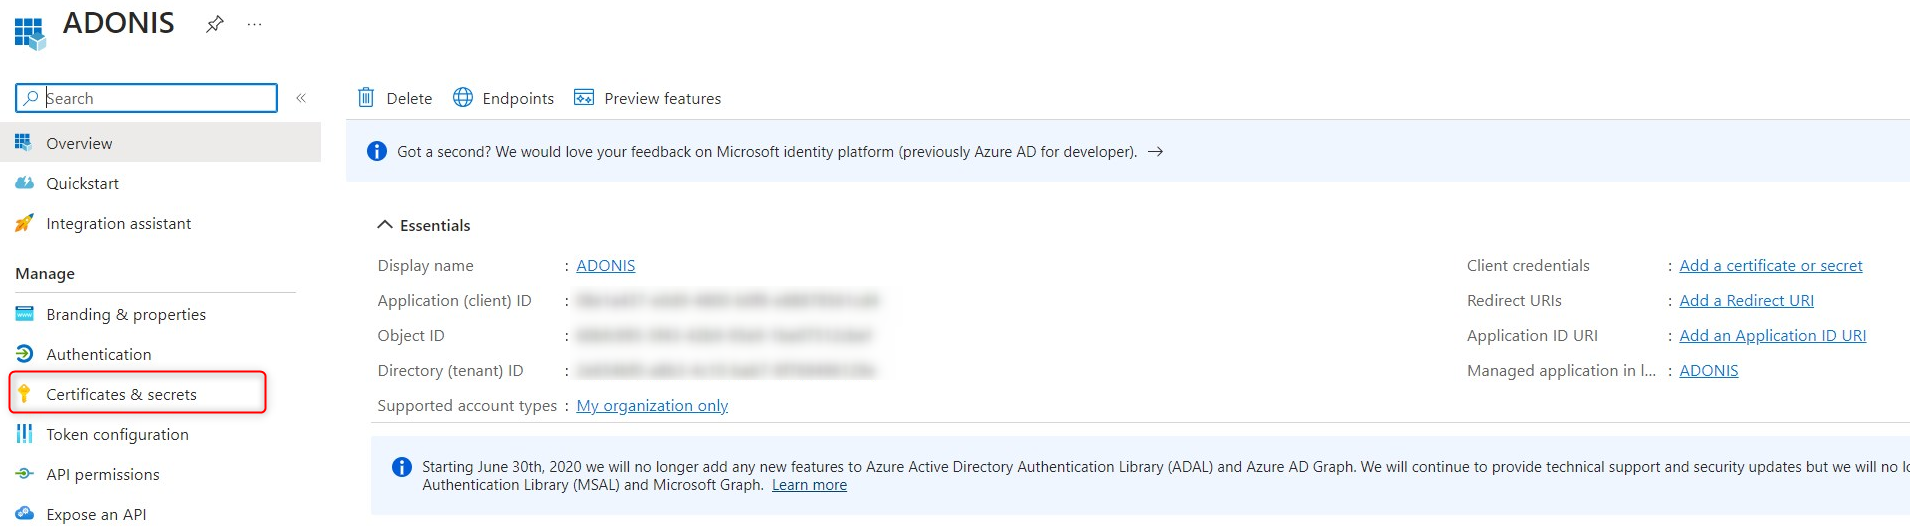 Click here to enlarge Click here to enlarge |
| 14. | Switch to the Certificates tab (1) and upload the Service Provider Token Signing certificate you received from BOC via Upload certificates (2). | 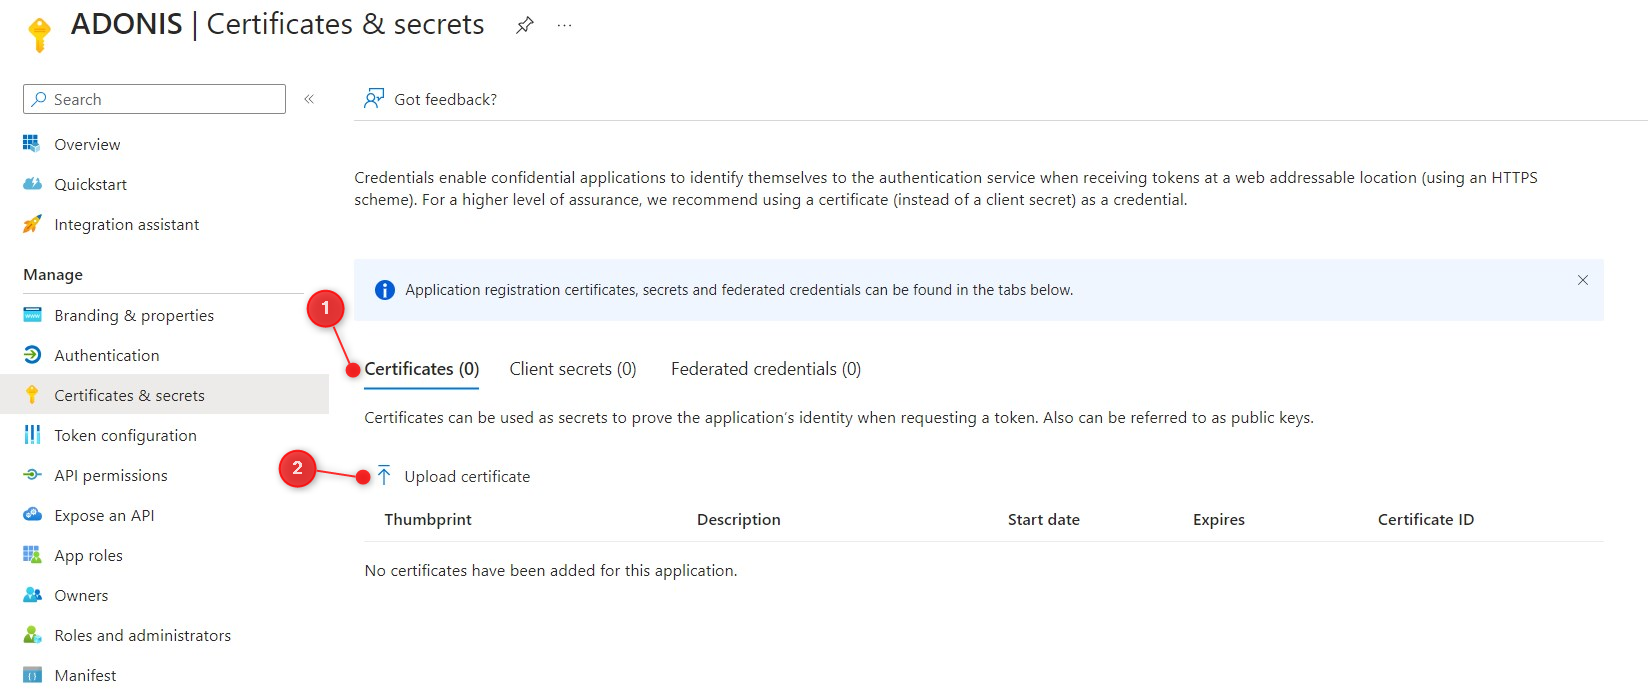 Click here to enlarge Click here to enlarge |
| 15 | Go back to your AD application and click on Users and groups on the right, then on Add user/group (1). Add the users and/or groups that should be able to access your BOC product. |  Click here to enlarge Click here to enlarge |
| 16 | The BOC technical customer support will now guide you through the next steps of your SSO setup. |