Installation Manual
1. Overview
This section describes
the installation of the ADOIT Enterprise Architect for Confluence app for Atlassian Confluence Cloud - see chapter 3
the configuration of ADOIT - see chapter 4
the set-up of the connection between the Confluence Cloud instance and one or more ADOIT instances - see chapter 5
2. Where to get ADOIT Enterprise Architect for Confluence
The ADOIT Enterprise Architect for Confluence app can be found in the Atlassian Marketplace ADOIT Enterprise Architect.
3. Installation of the ADOIT Enterprise Architect for Confluence app in Atlassian Confluence Cloud
This chapter describes the steps to install the ADOIT Enterprise Architect for Confluence app in Atlassian Confluence Cloud.
- In your Confluence Cloud instance go to Find new apps
- In the search field enter ADOIT Enterprise Architect for Confluence.
- On the right of the ADOIT Enterprise Architect for Confluence marketplace entry, select Try it free or Buy now.
- Proceed as suggested by the Atlassian Marketplace dialogs.
4. Configuration of ADOIT
This chapter describes the needed configuration to allow access to the ADOIT instances by ADOIT Enterprise Architect for Confluence.
For more details about RESTful services, OAUTH 2.0, and CORS policy, please refer to the ADOIT documenation.
REST API and OAuth 2.0 configurations require a restart of the ADOIT environment.
4.1. REST API
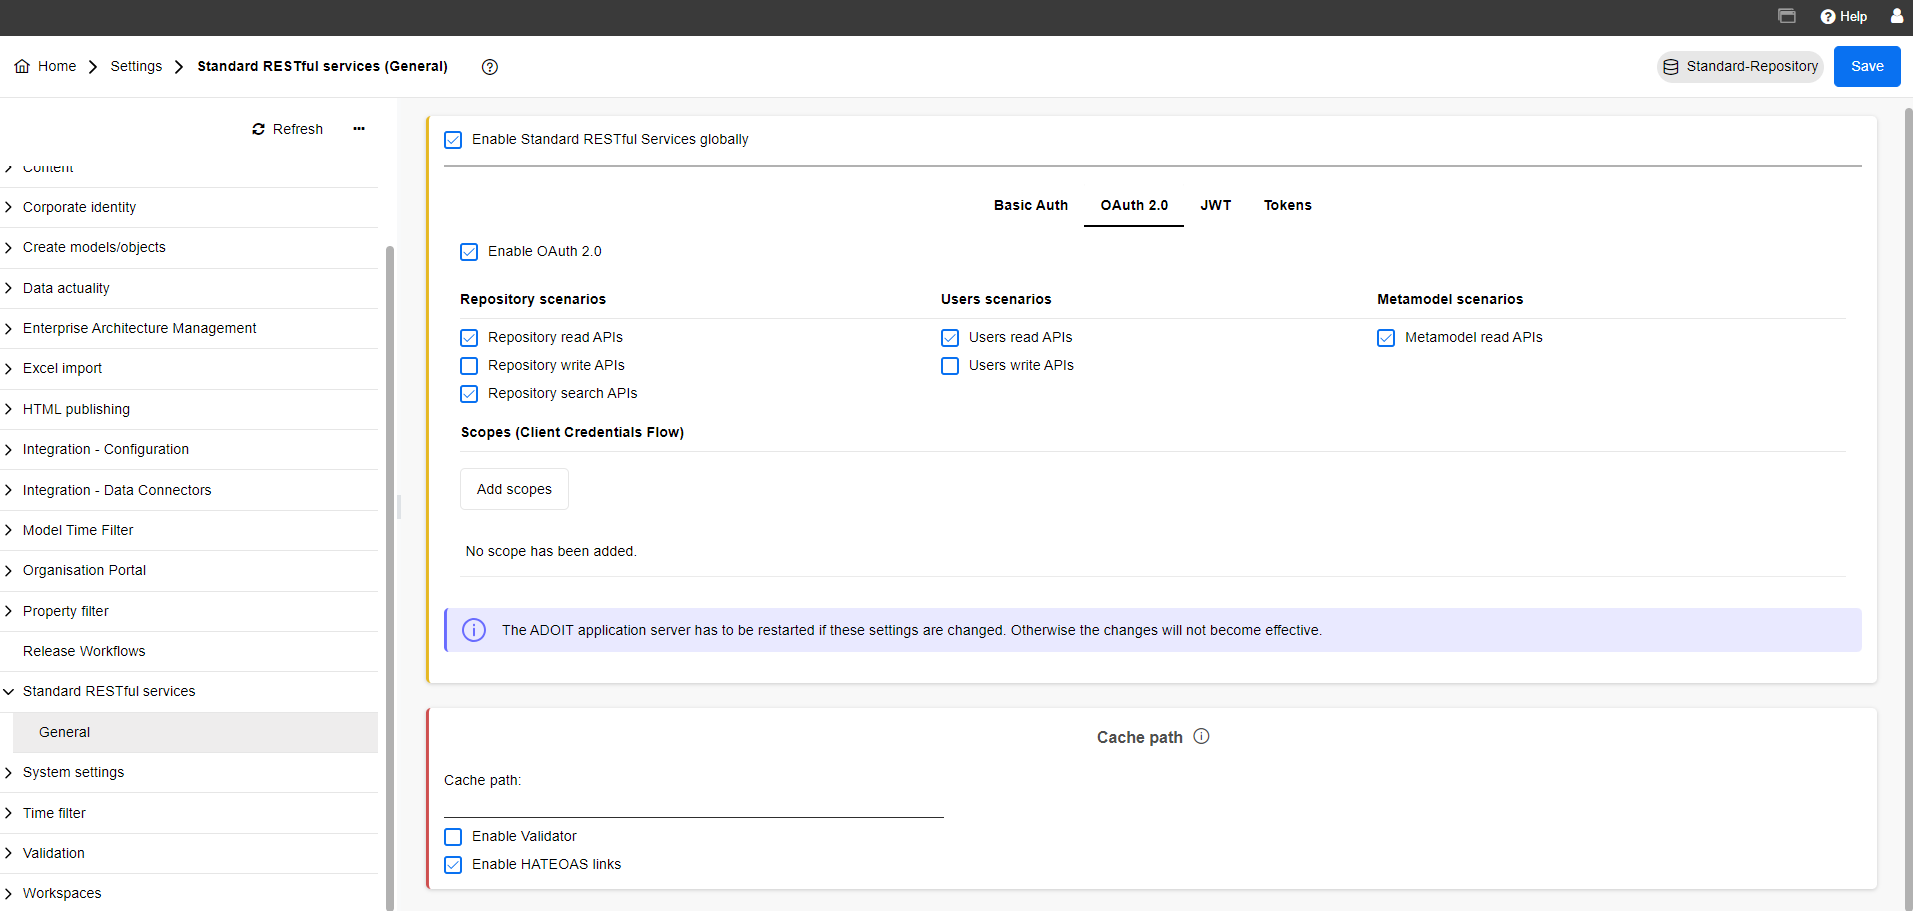
For ADOIT Version 17.0 and newer
In the new ADOIT Administration open Settings and go to Standard RESTful services. Make sure that Enable Standard RESTful Services globally is checked and open OAuth 2.0.
There Enable OAuth 2.0 has to be checked and some specific settings are required:
Repository read APIs
Repository search APIs
Users read APIs
Metamodel read APIs
Enable HATEOAS links
The configuration should look similar to the screenshot. Please note, that changes have to be saved by clicking on Save.
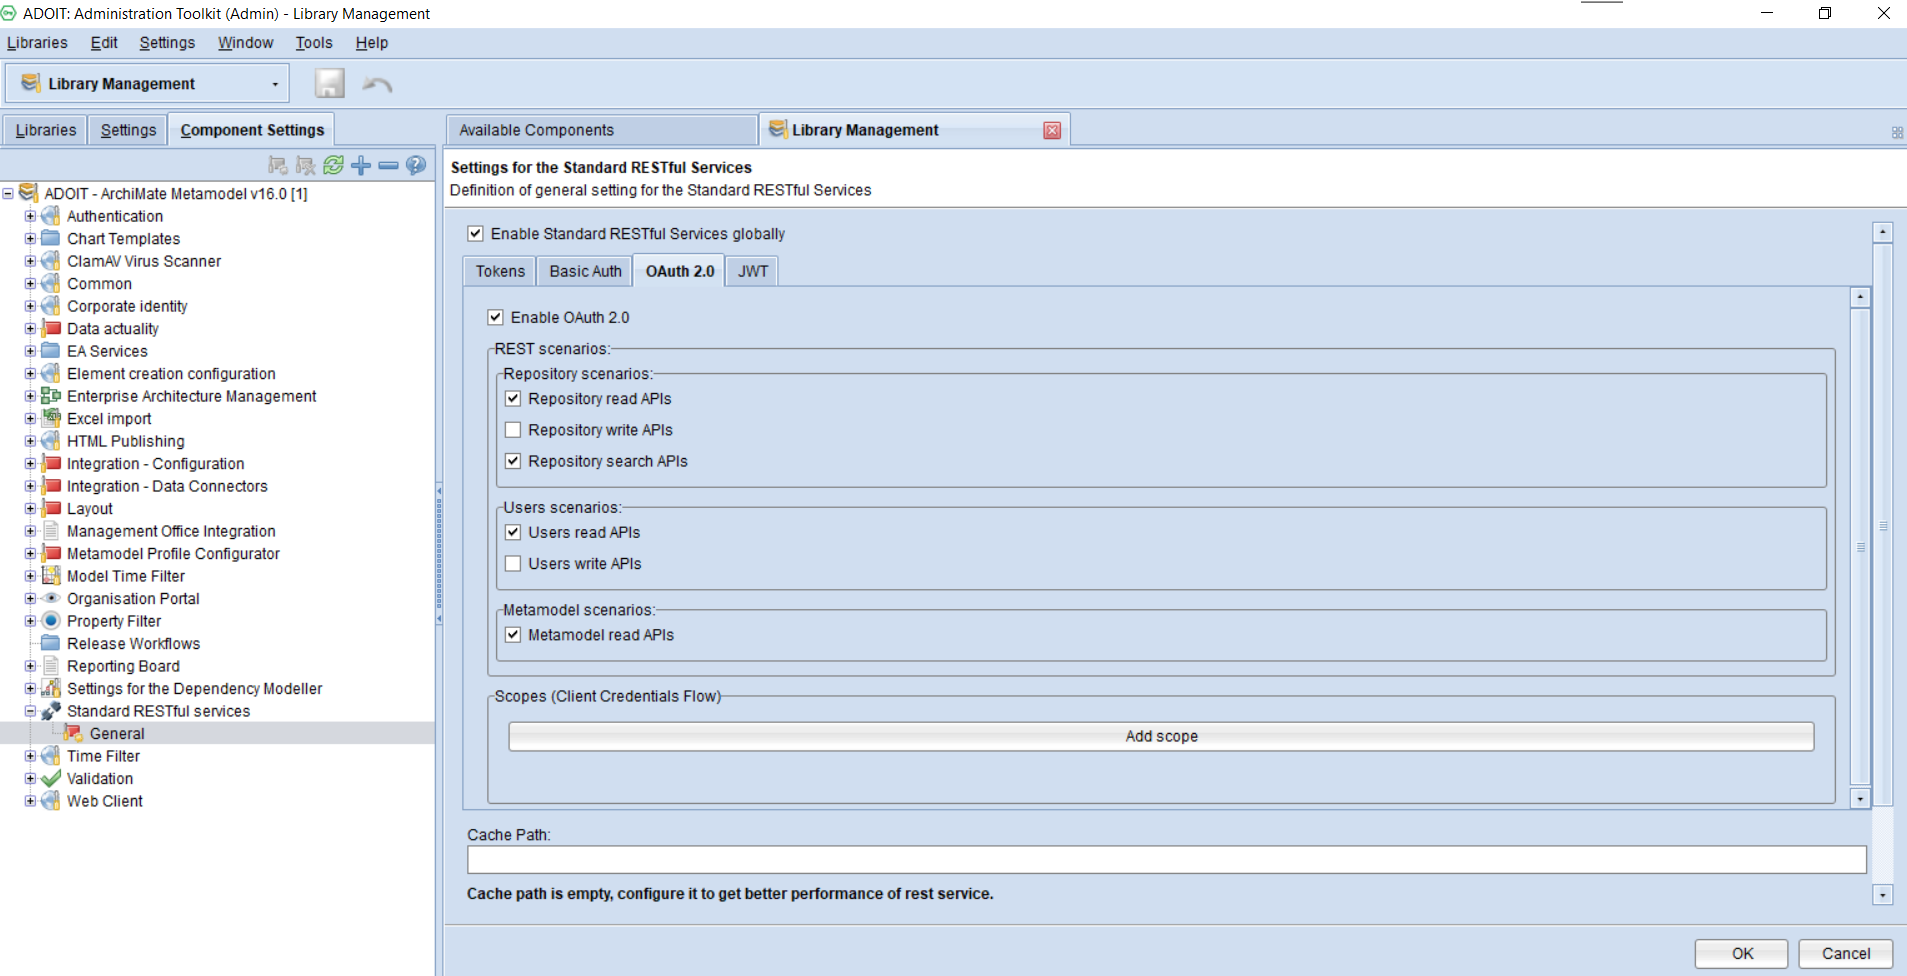
For ADOIT Versions older than 17.0
Please note that some specific settings are required.
Administration Toolkit REST scenarios:
Repository read APIs
Repository search APIs
Users read APIs
Metamodel read APIs
The configuration should look similar to the screenshot. Please note, that changes have to be saved by clicking on OK.
4.2 OAuth 2.0
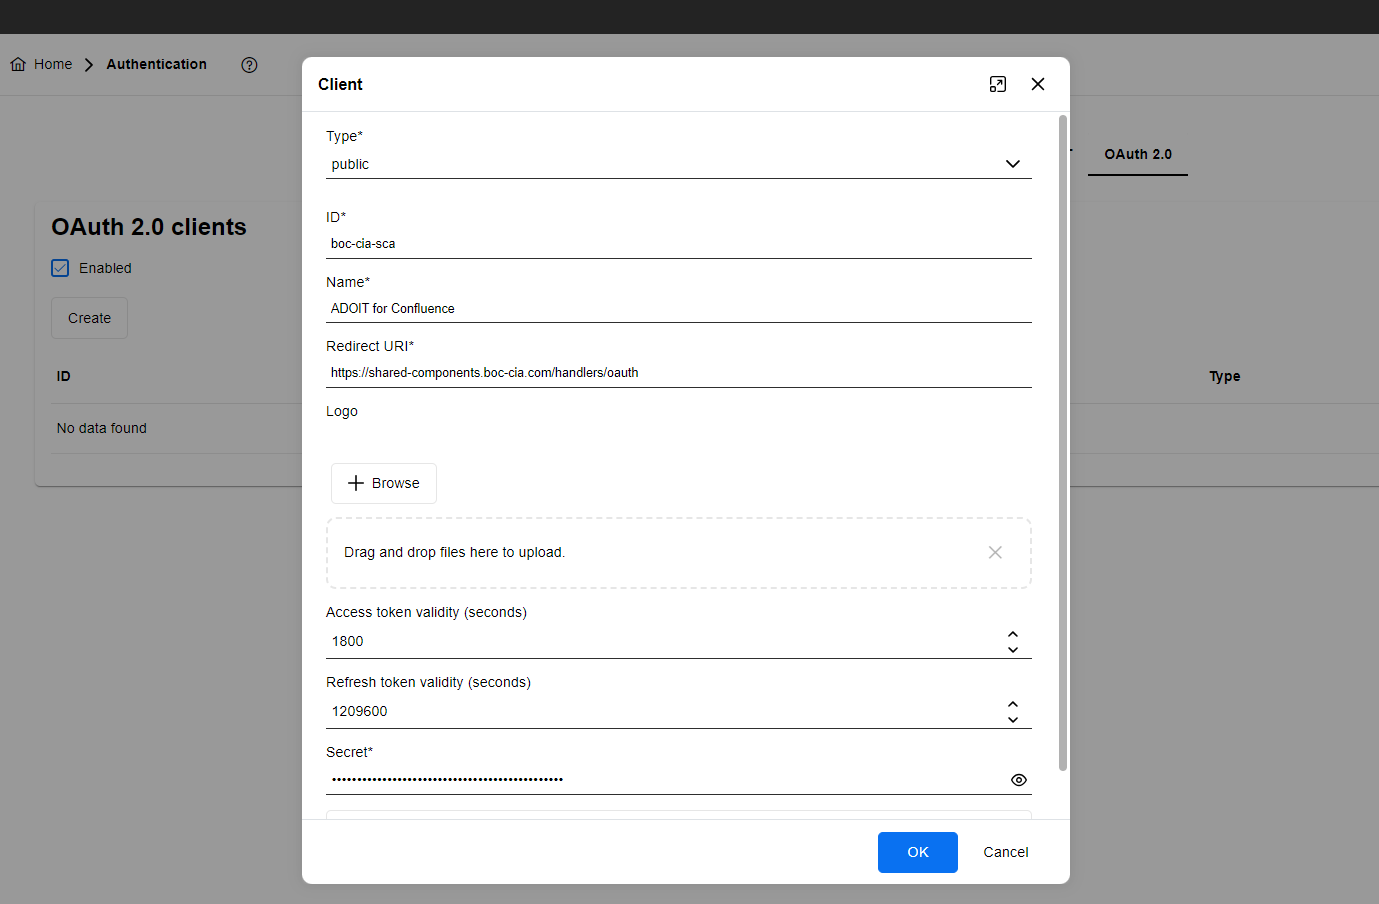
For ADOIT Versions 17.0 and newer
In the new ADOIT Administration open Authentication, go to OAuth 2.0, ensure that Enabled is activated and Create with the following details:
Type: Public
ID: boc-cia-sca
Redirect URI: https://shared-components.boc-cia.com/handlers/oauth
The configuration should look similar to the screenshot. Please note, that changes have to be saved by clicking on Save.
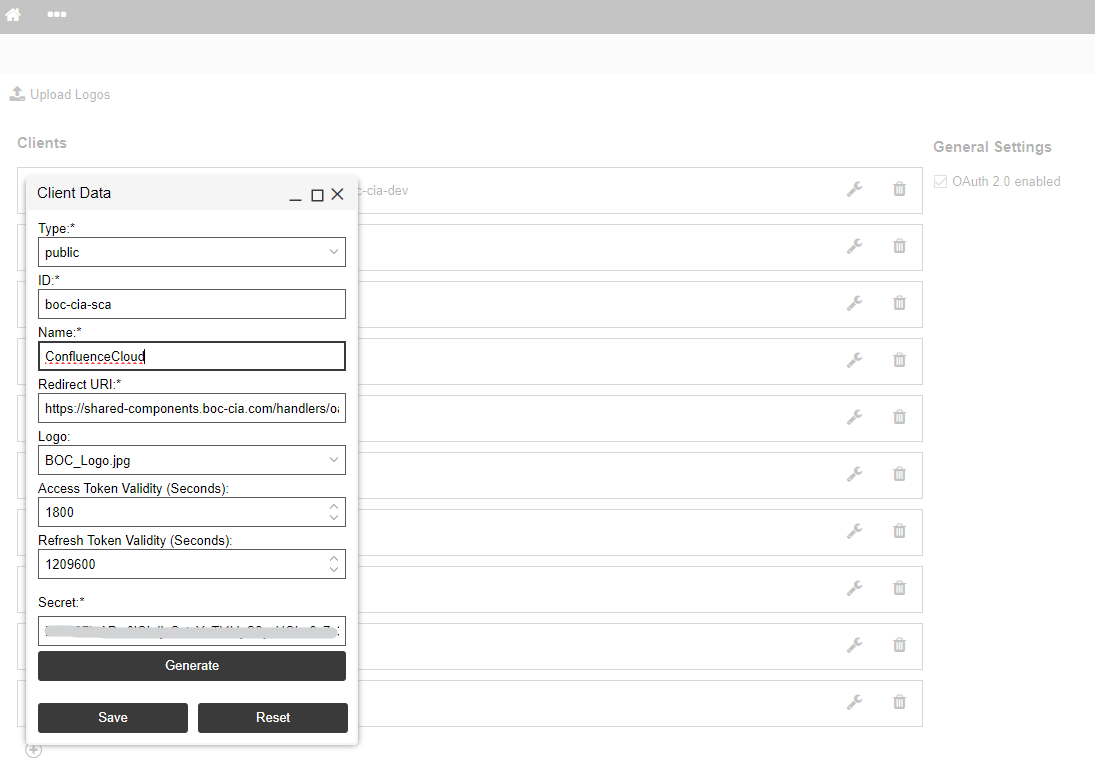
For ADOIT Versions older than 17.0
Access the web admin page (./admin.view) and open via the 3-dots-menu Authentication -> OAuth 2.0.
There you can make sure that OAuth 2.0 enabled is checked and with the + icon a New connector can be created with the following details:
Type: Public
ID: boc-cia-sca
Redirect URI: https://shared-components.boc-cia.com/handlers/oauth
The configuration should look similar to the screenshot. Please note, that changes have to be saved by clicking on Save in the Client Data dialogue and Save changes at the bottom right corner of the OAuth 2.0 screen.
REST API and OAuth 2.0 configurations require a restart of the ADOIT environment.
4.3. ADOIT CORS policy
For ADOIT Version 17.0 and newer
For more information about CORS whitelisting in ADOIT, see Configure CORS
In the new ADOIT Administration open Authentication, go to More options and open Security settings.
Allow whitelisted CORS has to be enabled and configured both in the chapters General and REST.
The following domains need to be whitelisted:
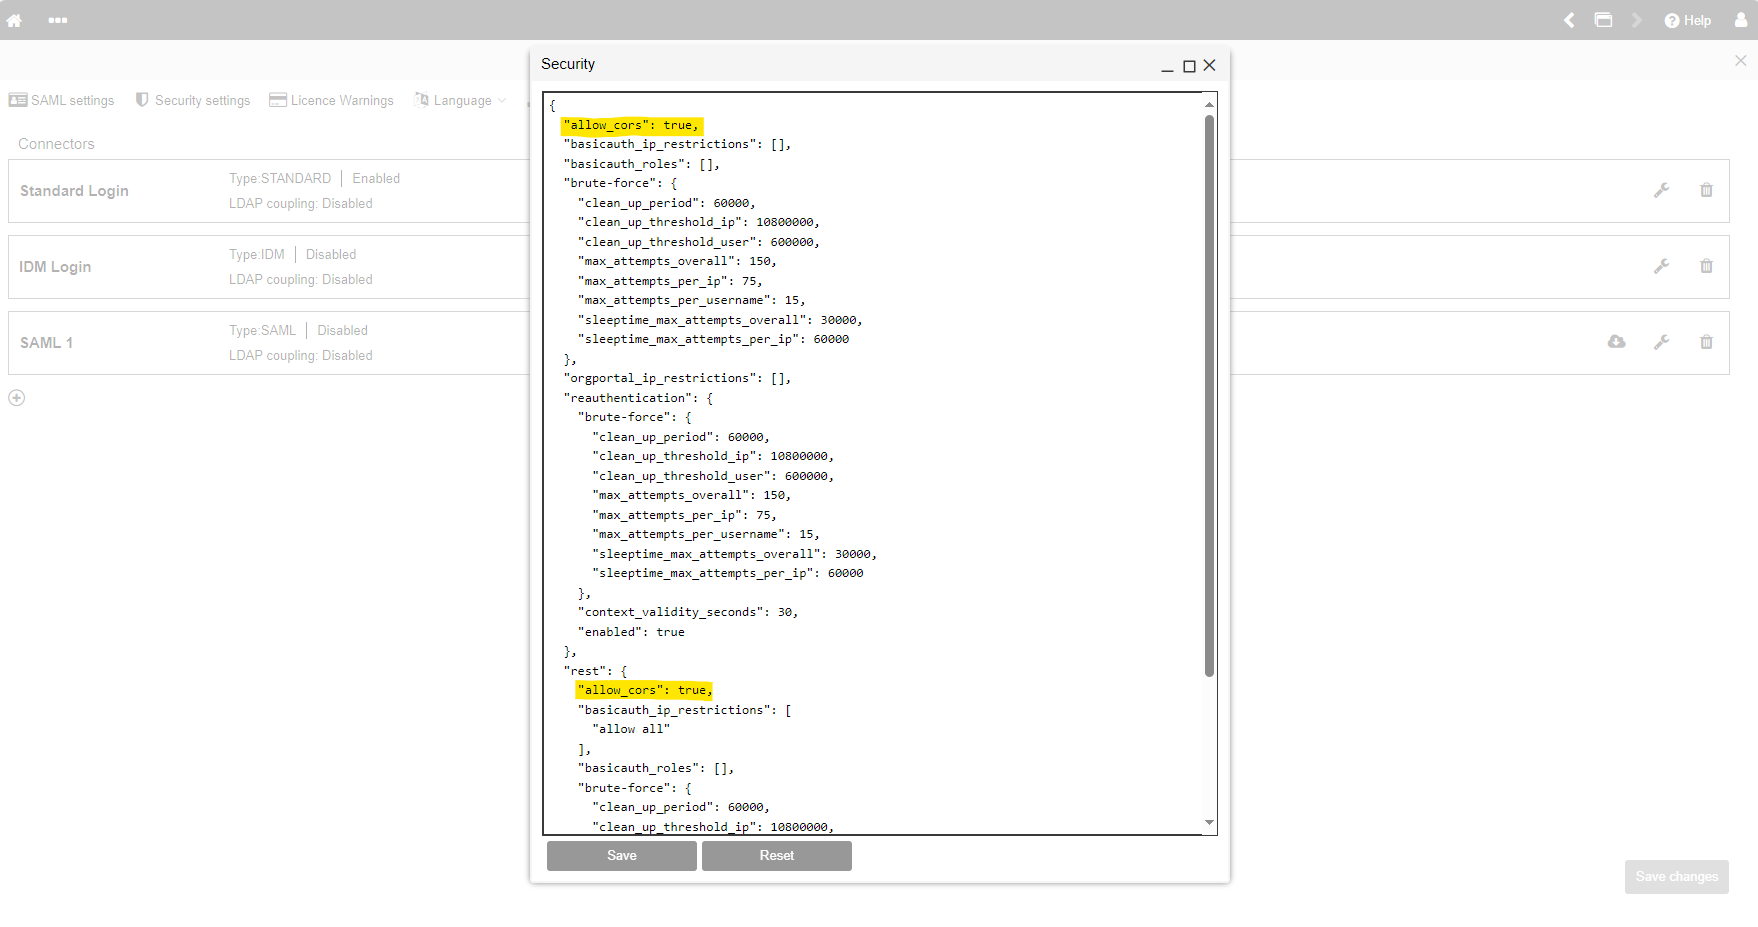
For ADOIT versions 15.1.13 or 16.0.8 and newer
The latest ADOIT versions support the configuration of CORS settings via Authentication Configuration settings on the web admin page (./admin.view).
Once logged in to the admin page, navigate to Authentication and open the Security settings.
In the Security window, "allow_cors:" has to be set to "true" twice and confirmed by Save changes.
For ADOIT versions older than 15.1.13 or 16.0.8
All ADOIT REST API requests are sent directly from the client web browser. To allow such requests, the following settings of the adoxx_web.properties server file must be set to true:
for all requests: security.rest.allow.cors
for OAuth 2.0 authentication process requests: security.allow.cors
If you are using ADOIT as SaaS, you can contact hotline@boc-group.com to configure the CORS policy.
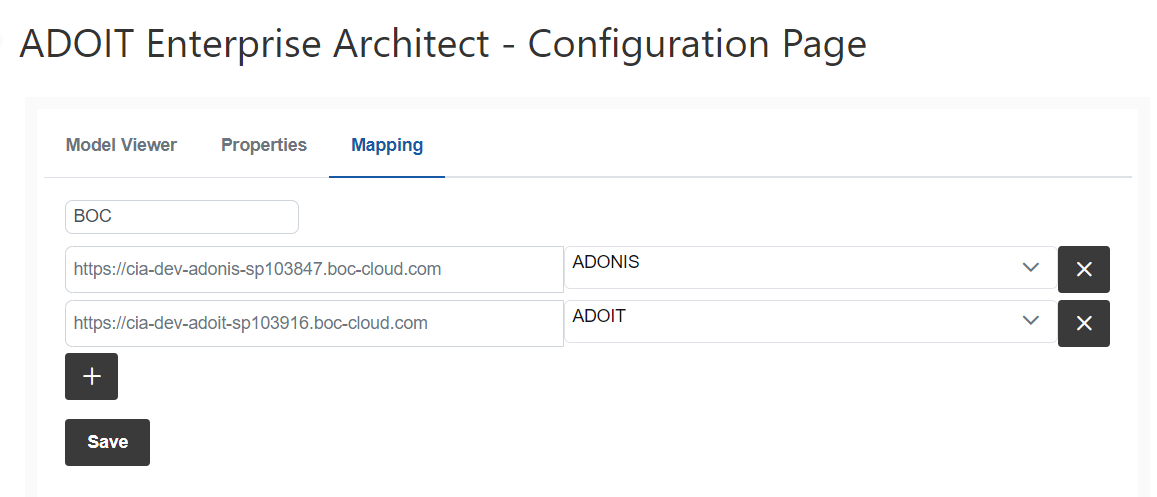
5. Set-up the connection from your Confluence Cloud instance to your ADOIT instance(s)
To connect your Confluence Cloud instance with one or more ADOIT instances, please got to
Apps > Manage apps > ADOIT Enterprise Architect > Configure > Mapping
Here you should add:
Mapping Identifier: Add the name of your mapping configuration, e.g. your company name
ADONIS/ADOIT URL: Add the URL of your ADOIT instance here
Application type: Choose if the URL belongs to an ADOIT instance
Each line represents a connected instance and a new line can be added with the + button. A line can be deleted with the x button.
After all changes are made, please confirm with Save.
If you are also using ADONIS Process Manager for Confluence, the connected ADONIS instances are also visible in the ADOIT Enterprise Architect configuration .
The Base URL set for the ADOIT (see related instruction) must be compliant with the URL provided in the connection setup. A common source of issues is that it is different (for example a test URL provided in a production environment) or additional endings like /auth.view, /main.view, etc. are added.