Personalized access with OAuth 2.0
This section describes how you can grant ADOIT Forms personalized access to your ADOIT contents with the technology OAuth 2.0.
You can only access and change ADOIT contents that your ADOIT user is permitted to. No additional access rights to ADOIT contents are granted by ADOIT Forms.
User prerequisites
You must have a personal ADOIT user (in the User Management of ADOIT Administration Toolkit)
The ADOIT user needs to have an ADOIT Forms license seat assigned
The ADOIT user needs to have at least one user group assigned
The ADOIT user needs to have at least one repository assigned
An assigned system role is not mandatory
Security and comfort improvements
Starting from version 1.7.0 of ADOIT Forms, additional security and comfort improvements are introduced (for ADOIT version 18.1.0 and higher).
- To avoid having to provide ADOIT credentials, it is strongly recommended to use ADOIT with SSO.
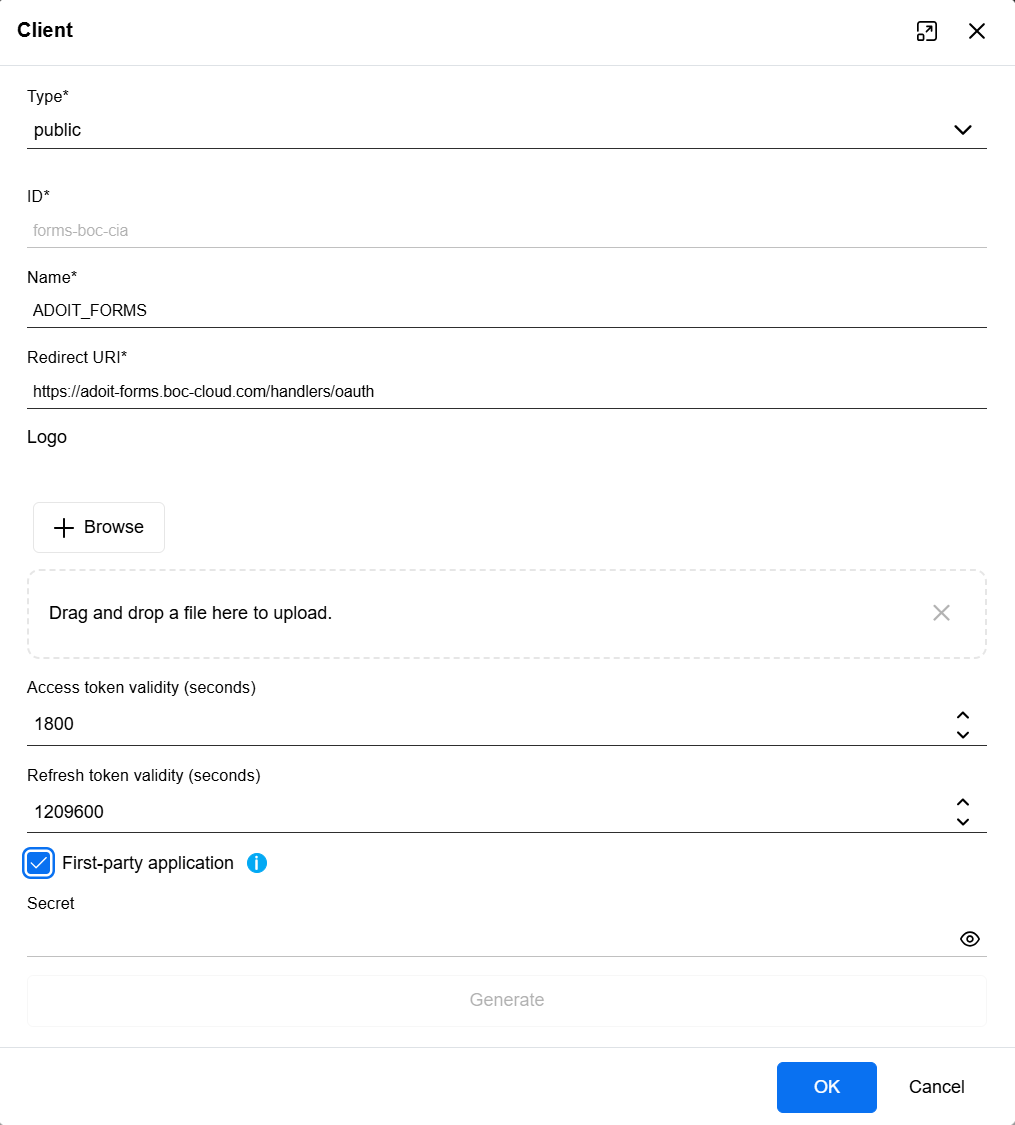
- To avoid having to explicitly approve the connection (see 2. Allow access below), the ADOIT Forms should be marked as a First-party application in the ADOIT Administration.
- For ADOIT instances connected after this change was implemented, ADOIT Forms is automatically marked as a First-party application by the setup script (see Installation).
- For ADOIT instances connected before this change was implemented, it might be required to set it up. Go to ADOIT Administration and open Authentication and OAuth 2.0 To set is up, the option First-party application should be enabled for the connection with the ID forms-boc-cia. OAuth 2.0 configuration is described here.
Connecting ADOIT version below 18.1.0 or without proper configuration described above, establishing the connection is more explicit as described below.
OAuth flow - establish a connection
You have to allow ADOIT Forms to use your ADOIT user by the following steps.
1. Login
Whenever you see the Connect dialog, please check if the correct ADOIT instance URL is visible and click on Connect.
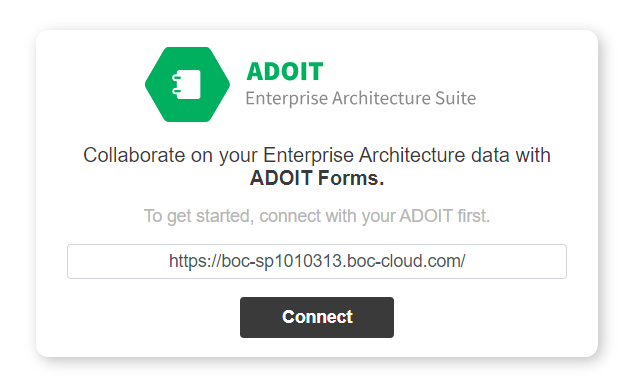
Before you click on Connect, verify that this is an actual ADOIT URL of your organisation!
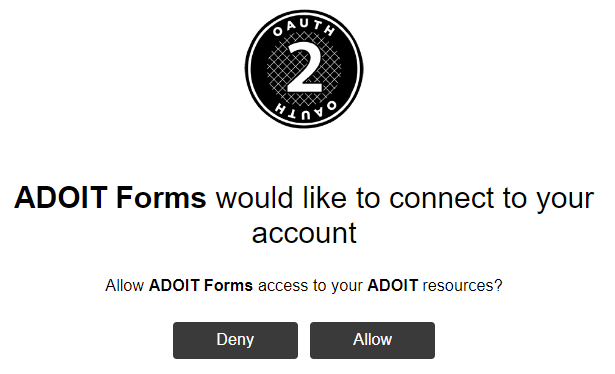
2. Allow access
After the successful login, please click Allow to connect ADOIT Forms to your ADOIT account.
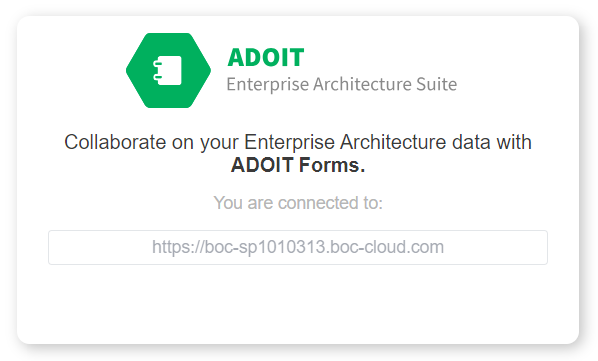
If your user is eligible for the connection, you will see the currently connected ADOIT instance on the ADOIT Forms start page.
Terminate access
Just click on the red logout button on the top right corner.
Alternatively, you can revoke access in your ADOIT user interface in the user menu under Applications.
Troubleshooting
Message: Access denied!
This message is displayed in two cases:
- User clicked explicitly on Deny
- User has an active session in ADOIT Administration