Model Viewer web part
The Model Viewer web part of the ADOIT Enterprise Architect for SharePoint enables you to display an ADOIT model as an interactive image in SharePoint and Teams.
With the Model Viewer web part you can:
- Add an interactive model image from ADOIT to SharePoint and Teams
- Get a closer look at the parts of the model you are interested in with zoom and drag and drop
- Get additional information on your model's objects as tooltips by clicking on them
- Access the model in ADOIT from your web part in SharePoint
How to use the Model Viewer web part
Add a web part to a SharePoint page
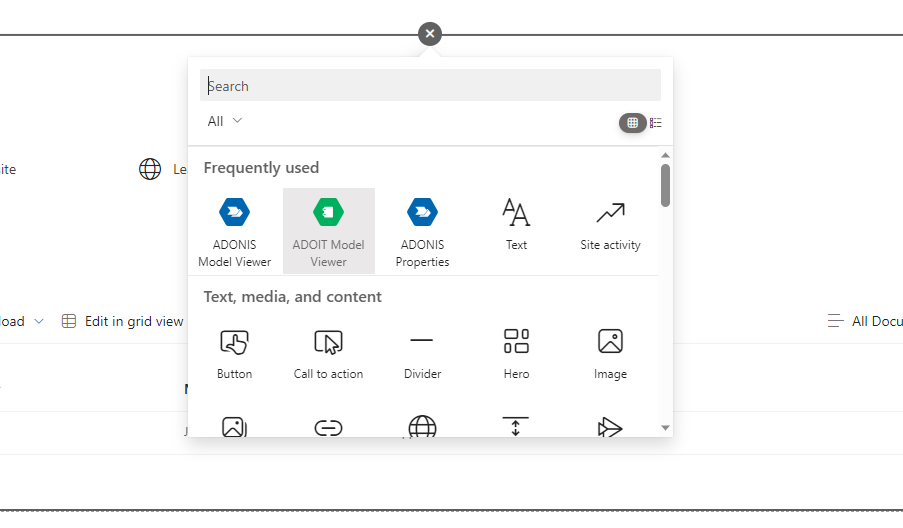
While editing a SharePoint page, add an ADOIT Model Viewer by selecting the web part from the Add a new web part dialog.
Once the blank web part is visible, you can open the ADOIT Model Viewer editor by clicking on Edit properties.
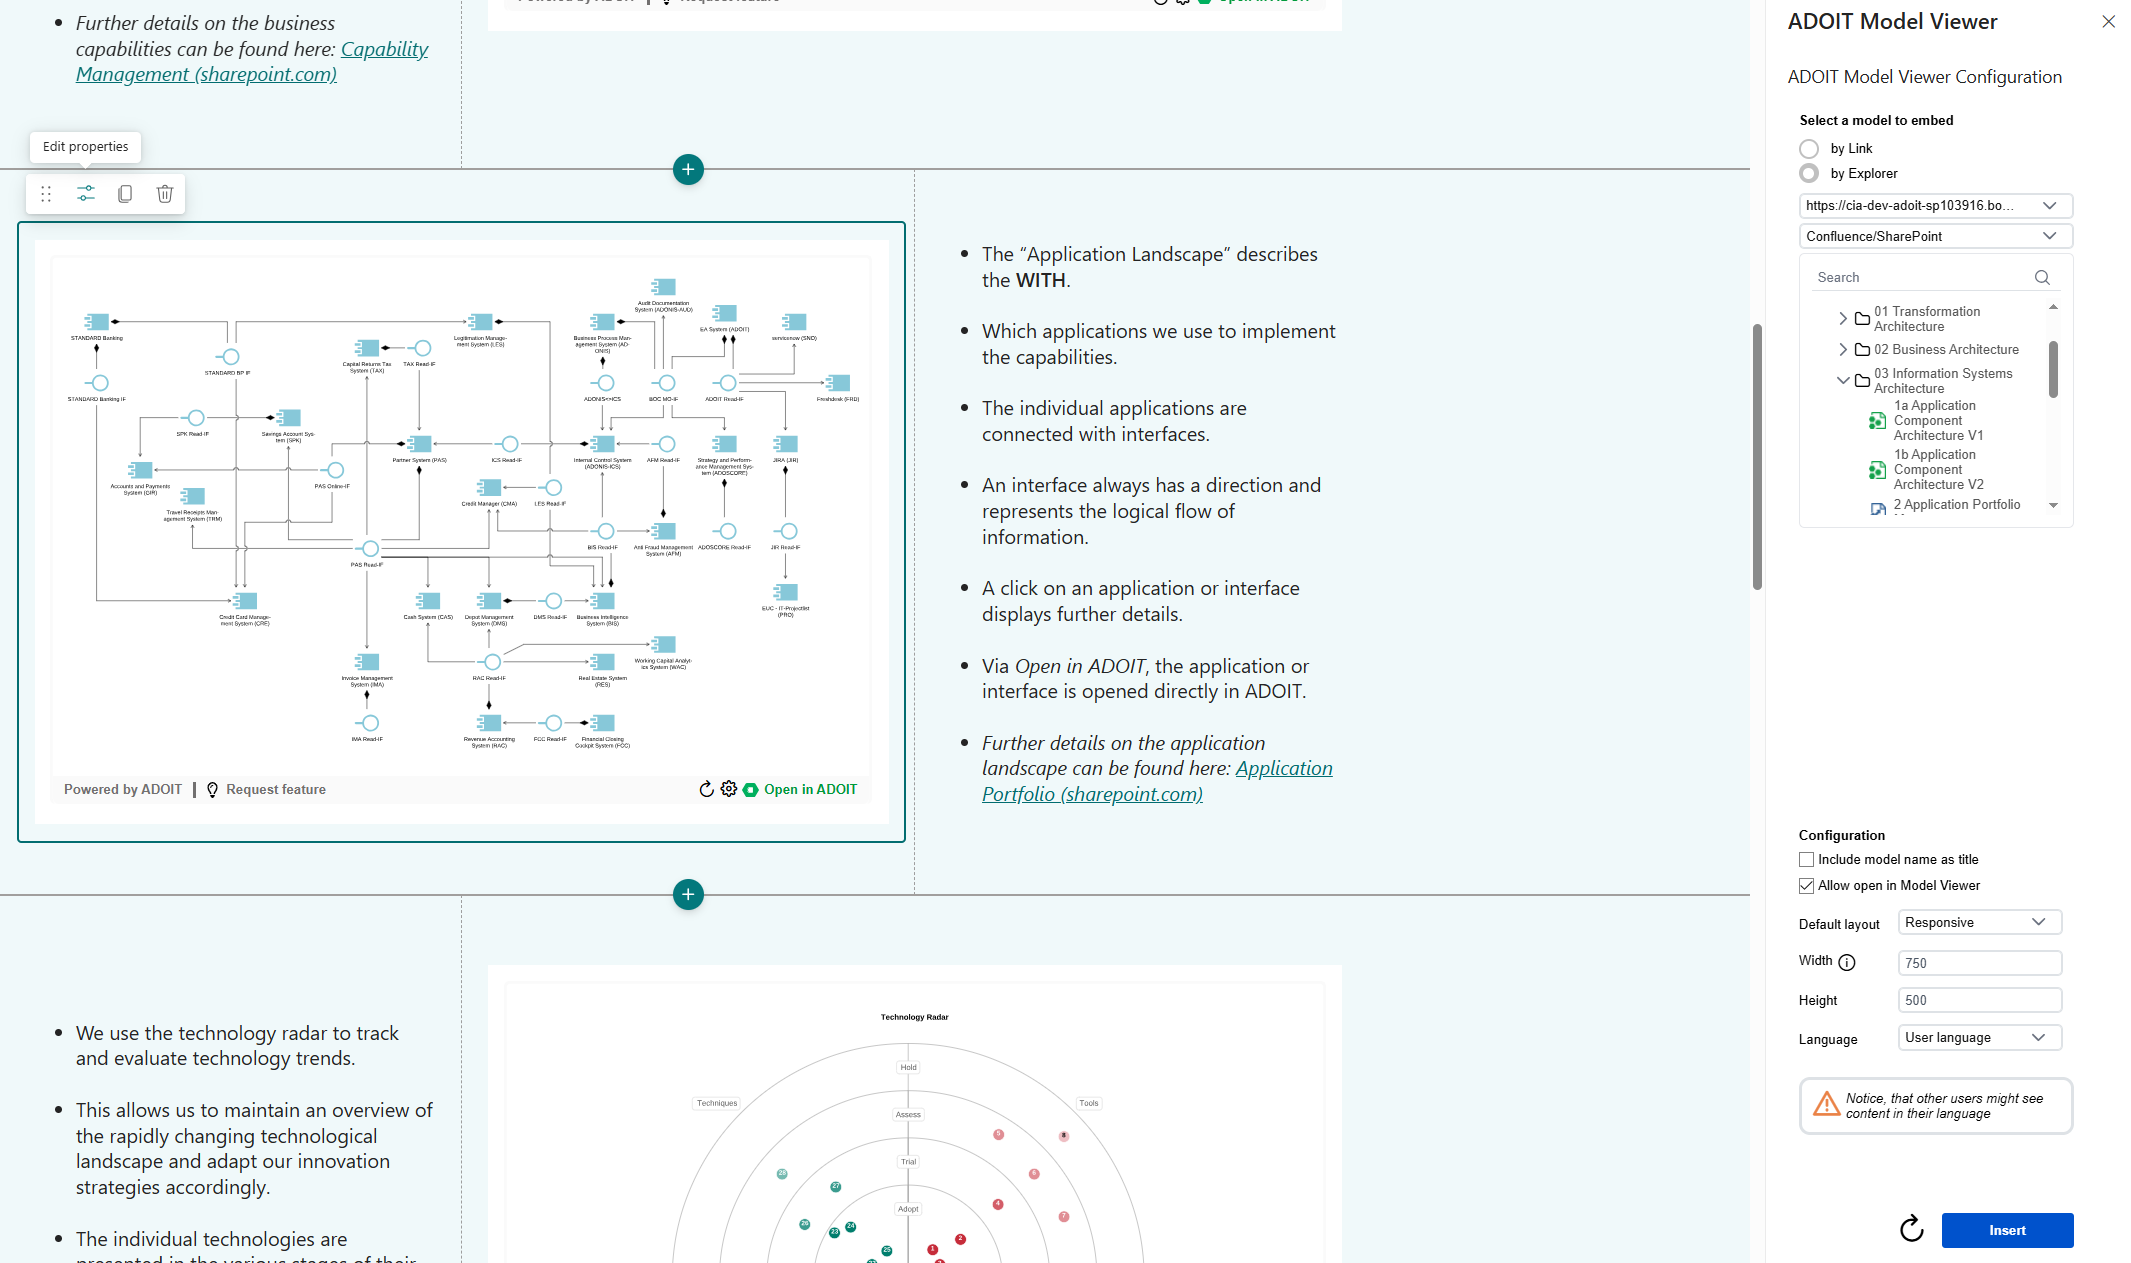
A configuration panel opens. Here you can add an ADOIT model URL, search for a specific model name, or select a model in the explorer view.
After selecting the model, you can define the visualization details of your model viewer.
If you don't want to show the name of your model above the model viewer, clear the "Include model name as title" check box.
Allow open in Model Viewer: When active, it is possible to open referenced models directly in the same Model Viewer web part.
As Default layout, Responsive or Fixed can be choosen. Responsive uses dynamically the whole available width and the manually defined height. Fixed uses the manually defined width and height.
You can define the width and height of the Model Viewer web part or else keep the default values. Width impacts only the default layout fixed.
To display a different content language of the model, available languages can be selected. If no model language is selected, the default language of your SharePoint instance is used.
When you are done configuring your model viewer, click "Insert". In case you want to change the visualization later, the model viewer configuration can be adjusted at any time while editing your web part.
View options
With the Model Viewer web part, you can display your model as an interactive image on your SharePoint page and Teams channel.
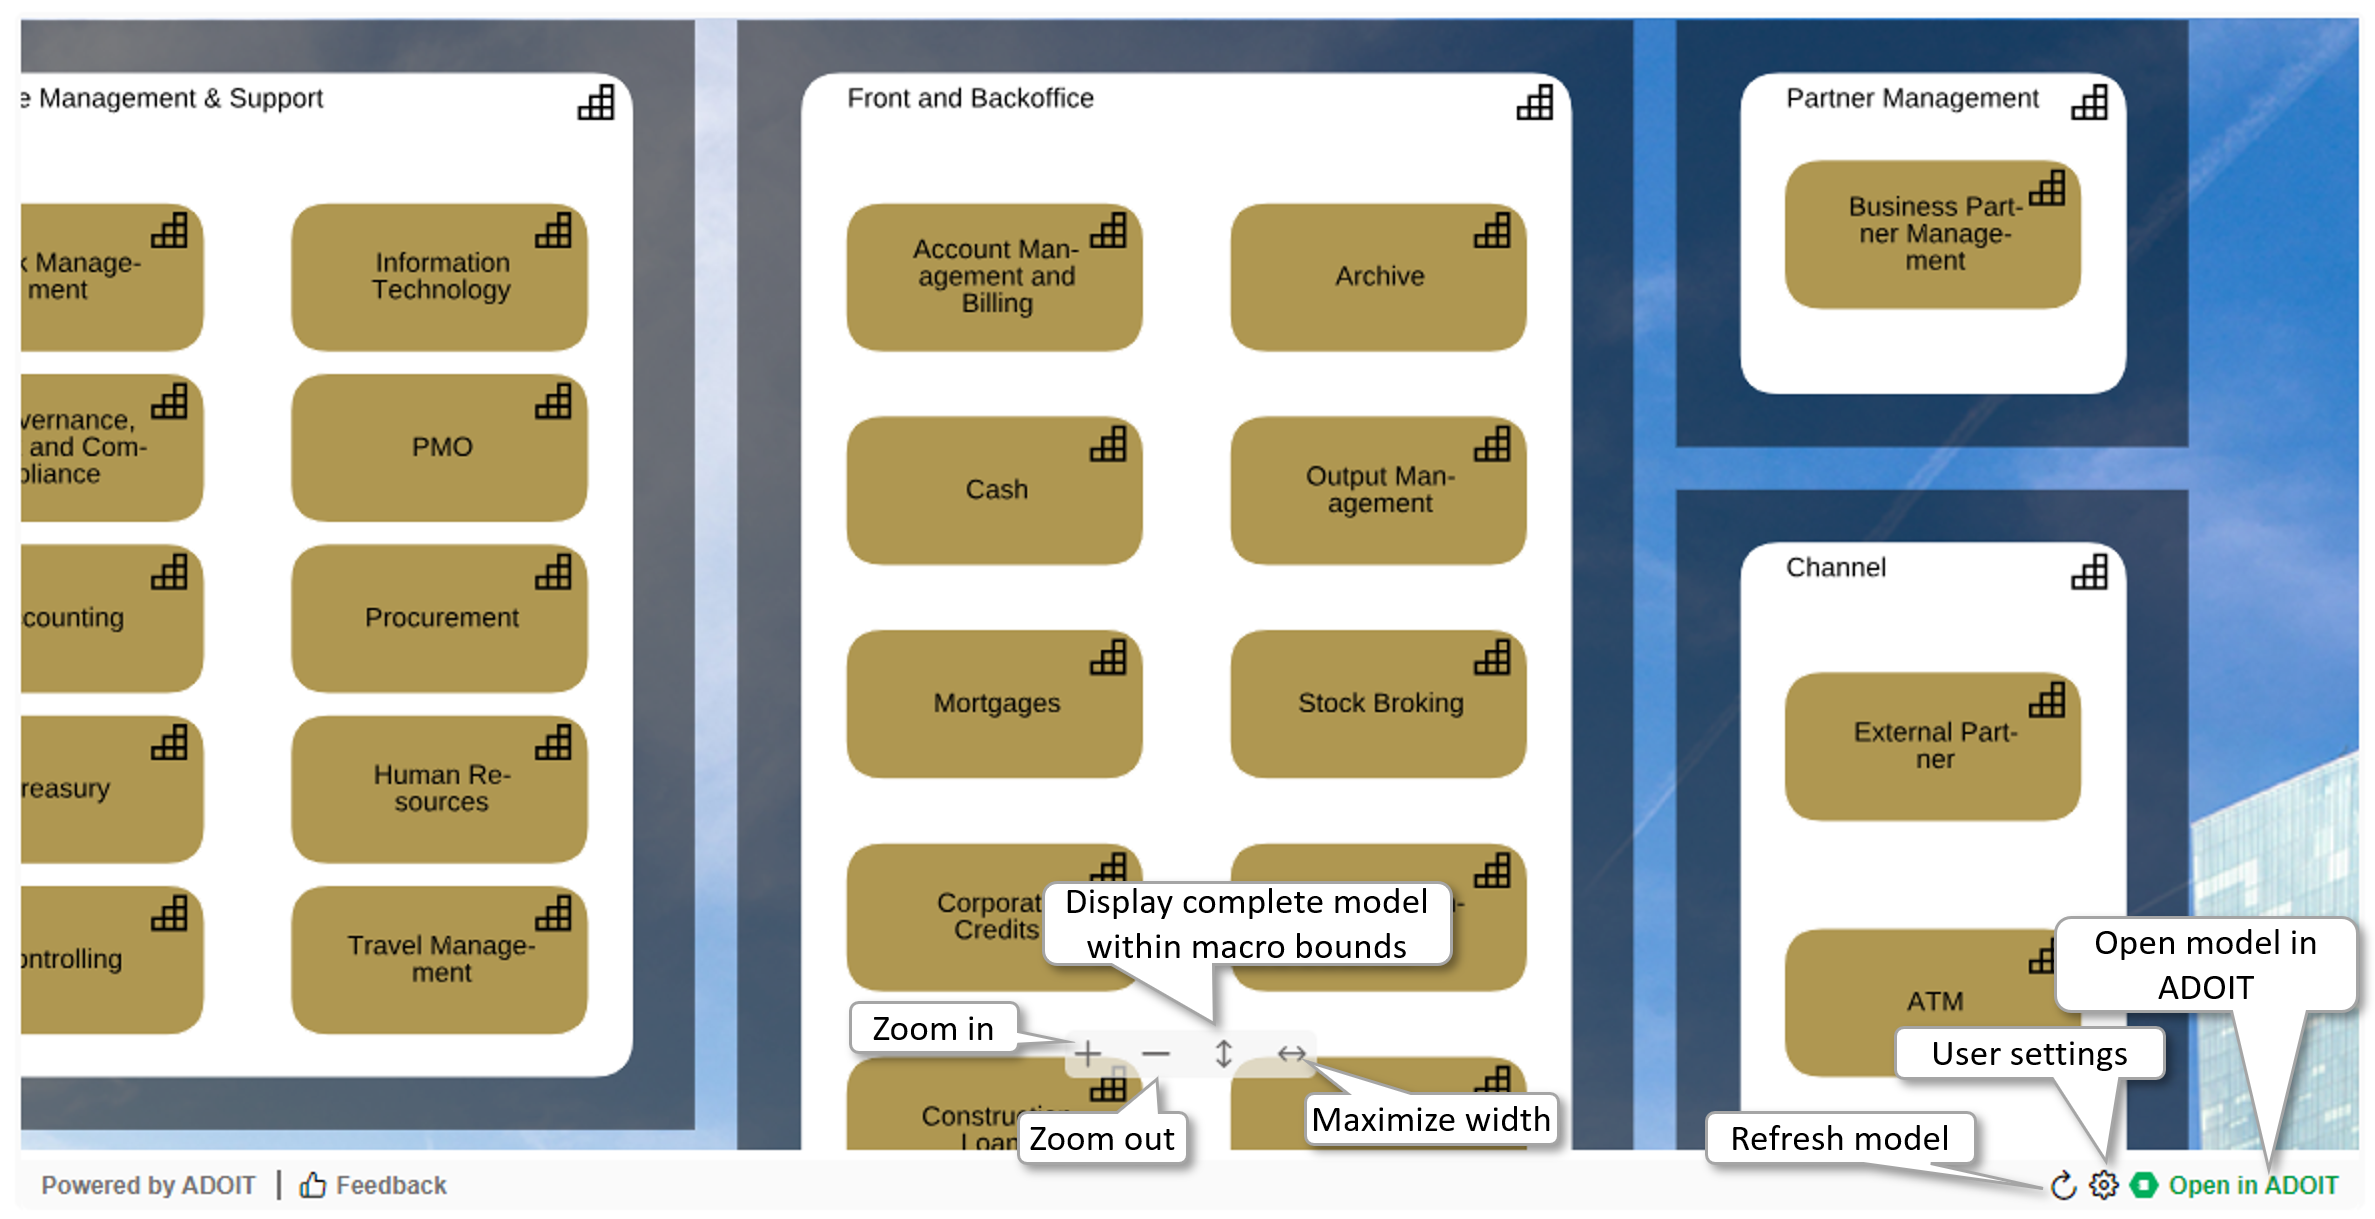
To zoom in/out of the model displayed in the model viewer, click the "+" and "-" icons.
To reset the zoom level of your model image, so that the complete model can be seen within the Model Viewer web part bounds, click the "Fit" arrow icon.
To maximize the width of the web part, click the "Maximize" arrow icon.
To open the corresponding model in ADOIT, click the "Open in ADOIT" button on the right below the model viewer.
To refresh your model image manually to synchronize its content with your ADOIT instance, click the refresh button on the right on top of your model viewer. A refresh is needed for example, if the model language of the web part has been changed.
To get additional information about the model's objects as tooltips, directly click on the objects.
Model Viewer object tooltips
The Model Viewer tooltips enable you to get attribute information of an object with a single click.
With a tooltip you can:
- Get the attribute values of the selected object
- Get relations of the selected object
- Access the object in ADOIT
Example of a Model Viewer tooltip:
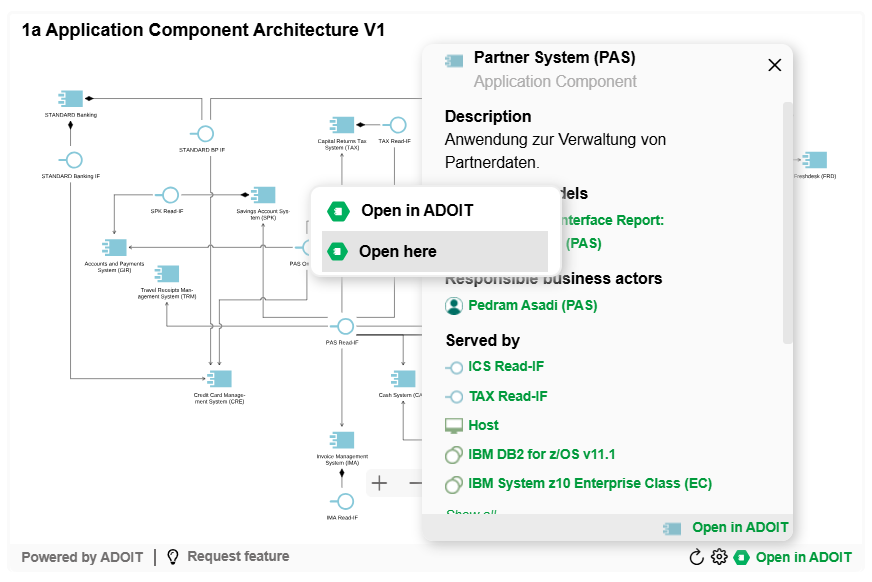
By clicking on a green relation, a dialog is opened:
Open in ADOIT: Leads directly to the notebook of this object or model in ADOIT
Open here (only for model relations): Opens the target model in the same Model Viewer web part
How to configure the Model Viewer web part
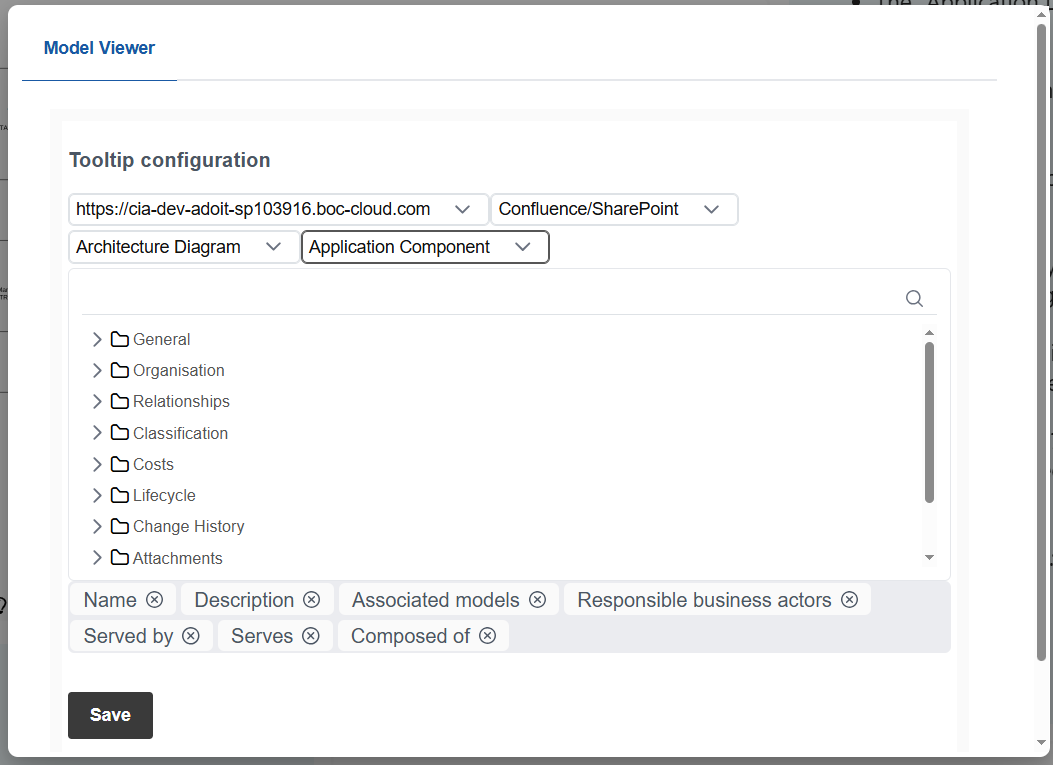
Visible attributes and relations in the tooltip
To define the attributes and relations that are visualized in tooltips, open Configure on your user page.
Please note, that this setting requires ADOIT 17.1 or newer.
Here you can add attributes and relations from the tree view to the selected object.
Add a Model Viewer to a Teams channel
Please see ADOIT web parts App for details.