Add Information to Models & Objects
The following sections provide an overview of functions for managing the attributes of models, objects and connectors.
The Notebook
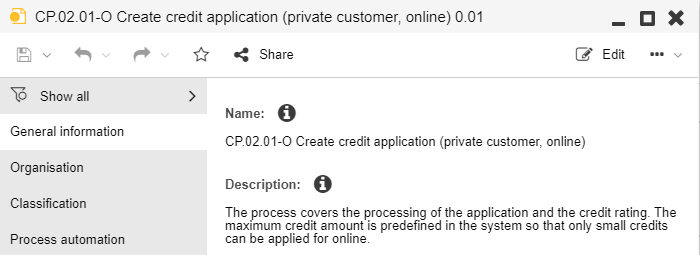
Models, objects and connectors have certain characteristics, which are called attributes. You can view and, if you have sufficient user rights, edit these attributes in the so-called Notebooks. In order to increase the clarity and user-friendliness, related attributes are aggregated in chapters in a Notebook.
Global Attribute Values vs. Model-Specific Attribute Values
In ADONIS the attributes of repository objects both have global values as well as model-specific values. A repository object that is used in a model after insertion contains the default values from the Object Catalogue. However, some of these values can be adapted specifically for the model without influencing the global values at all.
- Global Values: Properties that are identical in the Object Catalogue and in all models in which the object is used (e.g. name, description).
- Model-Specific Values: Properties that are specific to one object. Model-specific values that have not been specifically adapted in a model automatically use default values (e.g. colour, representation for some classes).
Open Notebook
Depending on the attributes to be displayed, the corresponding Notebooks have to be opened from different locations.
Open Model Notebook
Every model has a set of attributes, the so-called model attributes. You can open the Notebook of a model from the graphical editor:
- Click the Properties button in the menu bar of the model.
Alternatively, you can open the Notebook of a model from the Model Catalogue:
Select the model and press <Alt> + <Enter> or:
Right-click the model, point to Open, and then click Properties.
The Notebook of a model opens in a freely floating window.
Open Object Notebook
All object types, whose attributes shall be accessible, are equipped with a Notebook as well. You can open the Notebook of an object from the graphical editor or from the Object Catalogue. Choose one of the following options:
Double-click the object or:
Select the object and press <Enter> or:
Right-click the object, point to Open, and then click Properties.
Additionally, you can open the Notebook of an object from the textual view and from the tabular editor.
When opened in the graphical editor, the Notebook of an object opens in a freely floating window. When opened in the Object Catalogue, the Notebook of an object opens integrated into the main application window (docked).
When you open the Notebook in the graphical editor, the Notebook with the model-specific attribute values of the object is opened. When you open the Notebook of a re-usable object in the Object Catalogue however, the Notebook with the global attribute values of the object is opened.
These options also allow you to open the Notebook of a connector, if one was defined for it in the product configuration.
Edit Attributes
Different types of models/objects/connectors have different types of attributes that can be maintained. For simple text attributes the new value can be entered directly into the Notebook or selected there. For complex attributes input support dialogues and other functions are available.
Switch between Read Mode and Edit Mode
It is possible to switch between a read mode and an edit mode. Read mode allows for quick browsing of all attributes of a Notebook.
If you want to edit the attributes in a Notebook, you need to switch to edit mode first. In order to do so:
- Click the Edit button
 in the
menu bar of the open Notebook.
in the
menu bar of the open Notebook.
In order to switch back to read mode:
- Click the Read button
 in the
menu bar of the open Notebook.
in the
menu bar of the open Notebook.
Open Chapter
Open a Notebook chapter to browse the attributes which are aggregated within. In order to show/hide a Notebook chapter:
- Click the chapter name.
Show Attribute Information
Each attribute has an info text that provides you with information about what this attribute is used for. In order to open the info text of an attribute:
- Click the icon
 .
.
Manage Relations
Manage relations between objects or between objects and models in the Notebooks of the objects/models.
Create New Object
In order to create a new object and reference it in an attribute:
Click the icon
 . A dialogue
window opens.
. A dialogue
window opens.Select a name, object type and target folder for the new object. Confirm with OK.
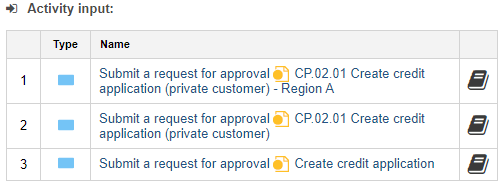
Add Relation
You can create relations easily by drag & drop without profound knowledge of the modelling language.
Proceed as follows:
- Drag the model or object you want to reference from the Explorer to the Notebook. ADONIS will show you which relations are possible and let you decide which one to create. You will jump directly to the selected attribute.
If ADONIS recommends a specific relation, it will be shown at the top. Incoming relations are displayed on the right and outgoing relations on the left.
Alternatively, if you know exactly which relation you want to add:
Click the icon
 . A dialogue
window opens.
. A dialogue
window opens.Select the object(s) or model(s) you want to reference and confirm with OK.
When referencing a modelling object, the model in which the modelling object is maintained is visualised as well.
Delete Relation
In order to delete a relation:
- Select the relation, and then click the icon
 .
.
Delete Relation and Referenced Object
In order to delete a relation and simultaneously delete the referenced object from the database:
- Select the relation, and then click the icon
 .
.
If you modify relations between objects, the modified connectors can be displayed in the graphical editor by clicking update all relations in the context menu.
Open Model or Object Notebook
A referenced model can be opened by clicking on it.
A click on a referenced object opens its Notebook.
Open Model Notebook
In order to open the Notebook of a referenced model:
- Click the Properties icon
 .
.
Open Notebook of the Relation
In order to open the Notebook of the relation to a referenced model or object:
- Click the Open properties of the relation... icon
 .
.
Format Text
In order to format a text attribute (e. g. a description):
- Click the Edit support window icon
 .
.
A support dialogue opens. You can edit text directly in the text field and format it using the different icons offered by the quick access bar.
You can copy formatted text from Microsoft Word into the text window. ADONIS recognizes the formatting and applies it to the text.
Check Change History
Depending on the product configuration, changes to objects are tracked in a change history. You can access the change history through the Notebook of an object. In order to do so:
Click the More button
 in the
menu bar of the open Notebook.
in the
menu bar of the open Notebook.Select the menu entry Change history
 from the drop-down menu.
Only repository objects have a change history.
If you are not able to view the change history, please ask your ADONIS administrator to activate the change history in the Administration Toolkit.
Synchronise Process Attributes
If you have already defined the attributes of a
![]() Business Process Diagram,
you can enable synchronisation to also display these attributes in the Notebook of a
Business Process Diagram,
you can enable synchronisation to also display these attributes in the Notebook of a
![]() Process object.
Process object.
How does synchronisation work?
You can synchronise common properties (= attributes) between a Process and a referenced Business Process Diagram.
The direction is one-way: data flows from the model to the object. All common properties in the Notebook of the Process will be overwritten.
The model attributes will be displayed read-only in the Notebook of the Process.
When you edit common properties in the Notebook of the Business Process Diagram, all changes will be pushed to the Notebook of the Process.
Enable Synchronisation
To enable synchronisation between a Process and a Business Process Diagram:
Open the Notebook of the Process where you want the model attributes to be displayed.
Using the Referenced business process/process landscape attribute in the chapter "General information", add a reference to a Business Process Diagram if none exists yet. The Synchronise button
 will
become active (no longer greyed out).
will
become active (no longer greyed out).Click the Synchronise button
in the menu bar of the Notebook, and then click OK.
ADONIS will now overwrite common properties with the properties from the referenced Business
Process Diagram and keep them synchronised. The Synchronise becomes black and shows a different
icon (![]() ) to indicate the new state.
) to indicate the new state.
Edit Synchronised Attributes
You can edit synchronised attributes in the Business Process Diagram's Notebook as usual. In addition, you can also start editing from the Process Notebook:
- Click the Edit button next
to the attribute you want to edit.
The Notebook of the Business Process Diagram opens. You jump directly to the selected attribute.
Stop Synchronisation
To stop synchronisation between a Process and a Business Process Diagram:
Open the Notebook of the Process that has synchronisation enabled.
Click the Synchronise button
 in the menu bar of the Notebook, and then click OK.
ADONIS will now stop synchronising common properties. The Synchronise becomes white and shows a
different icon (![]() ) to indicate the
new state.
) to indicate the
new state.
When you stop synchronisation, the values in the Process Notebook will not be deleted but remain as they are.
Object Ownership
In ADONIS a user can be assigned ownership of a repository object (e.g. Applications, Processes etc.). In order to do so, the user is assigned as Responsible Person (object attribute in the Notebook chapter "Organisation").
The object owner is responsible for the content of the object. They will be granted write access to the object, even if they usually only have read access.
By default a user who creates an object is automatically assigned ownership.
Close Notebook
In order to close a Notebook:
Press <Esc> or:
Click the icon
 .
.